Blog · · 3 min read
How to Polish a Car and Remove Scratches
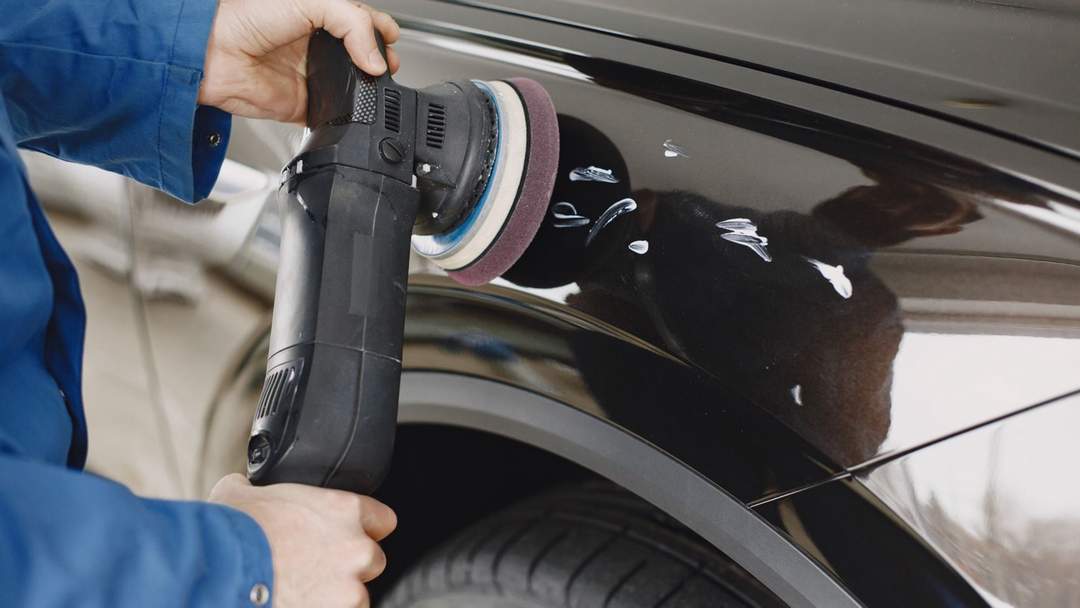
Polishing is a very fine sanding of the top layer of clear coat. The tiny grains in the compound level the surface so the edges of a scratch disappear and light reflects in one direction. That is what gloss is. So polishing does not "fill" a scratch; it removes clear coat down to the bottom of it.
How much clear coat you have
Factory paint is about 100 to 120 microns in total, of which the clear coat on top is 35 to 50 microns, thinner than a sheet of paper. Every heavy polish takes a few microns from that reserve. That is why a professional measures paint thickness first and never lingers on edges and body lines, where the clear coat is thinnest.
Three stages
Cutting compound and a hard pad. Removes scratches, oxidation and wet sanding marks. It works fast but leaves fine swirls on the surface.
Polishing compound and a medium pad. Removes the marks of the cutting stage and brings back the gloss.
Finishing compound and a soft pad. Removes holograms, the fine swirls visible in sunlight, especially on dark colours.
A lightly marked surface, such as car wash swirls, often needs only the last two stages. A deep scratch that catches your fingernail cannot be polished out.
How the process goes
Wash and decontaminate. Grit and dirt under the compound make new scratches. Wash the car, use a clay bar if needed, and mask rubber and plastic trim with tape.
Inspect under light. Scratches and swirls only show under direct light, so the work area must be bright.
Wet sand if needed. Clear coat defects, dust nibs or runs are first sanded with P1500 to P3000, then polished.
Polish. Work in small sections of about 50 cm, with the machine flat and at low speed, without overheating the surface. A dual-action polisher is safe for beginners; a rotary is more powerful but causes heat and holograms more easily.
Protect. Polished clear coat is bare. Finish with wax or a protective coating.
A freshly painted panel should be polished only after the clear coat has fully cured. The exact time is in the clear coat's data sheet.
Headlight polishing
A plastic headlight leaves the factory with a UV-protective hard coat. Over the years this coat breaks down and the lens turns yellow and cloudy. Polishing removes the hazy layer and the lens becomes clear again, but it also removes what was left of the protective coat. Without protection the headlight yellows again within months.
So the right sequence is: wet sand from P800 to P3000, polish, and finish with a 2K headlight clear coat that takes over from the factory coating.
Where to find it
Polishing compounds are on the compounds page, pads and backing plates on the pads page, waterproof sandpaper on the sandpaper page, and 2K headlight clear coat under clear coats. Sandpaper grits are explained in a separate article.
Frequently asked questions
What is car polishing?
A very fine sanding of the top layer of clear coat with a compound and a pad. It removes scratches, dull patches and swirls and brings the gloss back.
How many times can a car be polished?
Clear coat is limited, about 35 to 50 microns, and every heavy polish takes a few microns. A light finishing polish once a year is safe; heavy cutting only when needed.
Why does a headlight turn yellow after polishing?
Polishing also removes the headlight's protective coat. Unless you finish with a 2K headlight clear coat, UV light yellows the plastic again within months.
Does polishing remove deep scratches?
No. If your fingernail catches in the scratch, it goes deeper than the clear coat, often into the colour, and needs paint. Polishing only removes scratches in the top of the clear coat.